Showing posts with label dessert. Show all posts

Sunday, April 17, 2016

Raspberry Dessert


There are few things in life that taste like "summer" to me more than raspberry dessert.  It's not much of a name, really, but it's what has stuck in my family for decades.  And as far as I can tell, this dessert pretty much only exists within my family.  It's more famous cousin, the raspberry jello pretzel salad, is chunkier and has that salty-sweet, cream cheesy thing going on.  But this fresh, bright, summery concoction is just sweet, soft Nilla wafer crumbs on the bottom, a creamy drizzle on top of that, followed by fresh, whole raspberries in jello, sweetened whipped cream, and a few more Nilla wafer crumbs and raspberries on top for garnish.  


Paul didn't ask me to marry him because of this dessert, but only because we started dating at the end of summer and were already married before raspberry dessert season came around.  It's what he has requested almost every year in place of birthday cake, which is saying a lot for someone like Paul who would typically go for a chocolate cake any day of the week.  Unless raspberry dessert is in play.  Then it's a fight to the finish to see who gets the last bite.  

Word to the wise though:  don't use birthday candles with this.   We learned from experience that the Nilla wafer crumbs on top go flying everywhere when the candles are blown out.


RASPBERRY DESSERT

Makes 1 square 8"x8" pan but we usually double it if it is for more than just the two of us

INGREDIENTS

1 package Nilla Wafers, finely crushed
1 small box raspberry Jello (don't mess around with sugar free)
1 egg
1 tablespoon butter, melted
1 1/2 cups powdered sugar
2-3 cups fresh raspberries, washed and dried
1 1/2 cups whipping cream
2-3 tablespoons powdered sugar
1 teaspoon vanilla

DIRECTIONS

Prepare Jello according to package directions, then place in the refrigerator to cool until it is thick and syrupy but not yet firmly set.

Place Nilla wafers in a gallon size Ziploc bag and crush to a fine powder using a rolling pin or pulse in a food processor. Use about half of the Nilla wafer crumbs to cover the bottom of a square 8"x8"­inch baking dish. Set remaining crumbs aside for the top of the dessert. Press down so it is compact, but don’t worry that there is no butter or anything to hold a crust together ­ it really is just Nilla wafer crumbs on the bottom of this dessert.

In a medium bowl, add butter, egg*, and powdered sugar and whisk until light, about a minute or two, to make a smooth and creamy sort of sauce that can be drizzled over the Nilla wafer crumbs.

The sauce doesn’t have to completely cover the crumbs on the bottom of the dish so don’t try spreading it around or anything because that will just create a mess. Just drizzle it on to get mostly even coverage. Next, sprinkle 2 cups of fresh raspberries over the sauce and crumb layers, making sure they are evenly distributed. Once the Jello has thickened to a syrupy consistency but hasn’t entirely set, pour over raspberries, then return dish to the refrigerator and allow Jello to set completely:­ at least another hour or two. When Jello has completely set, whip cream with powdered sugar and vanilla in a bowl, then gently spread on top of Jello and raspberries. Sprinkle remaining Nilla wafer crumbs on top (you may not need all of them if you feel like this layer is getting too thick), then use the remaining raspberries to arrange a pattern on top of the dessert and serve.

* Yes, this dessert has a raw egg in it and lots of people freak out about raw eggs, but I’ve eaten this every summer since I was a little girl and never had a problem. You can buy pasturized eggs if you are concerned because the USDA says those are safe to consume raw.

Saturday, February 20, 2016

Peanut Butter Cookies

The last time we visited Utah, Jennie had made these incredible peanut butter cookies and had them in a plastic container on her counter when we showed up.  Since both Emma and Adelaide are allergic to peanut butter and had been at our parent's house for a couple of days to play with my girls and go skiing with us while Jennie and Ryan stayed at their house with the twins, Jennie had tried out this recipe from one of our favorite cooking bloggers while her allergic girls were away at Grandma & Grandpas.  And then I helped polish them off when we all got to Jennie's place a couple of days later to enjoy more cousin time.

They are peanut butter cookie perfection and so incredibly good.  I have been looking for just the right peanut butter cookie recipe and tried some real duds, but this one does not disappoint.  Jennie had added M&Ms to the top of some of hers and since I had a bag of leftover Valentine's Day M&Ms in the cupboard, I did the same thing.  But next time I might take a more old-fashioned approach and roll them into balls and flatten ever so slightly with the tines of a fork, just because I love the traditional cross-hatch pattern.  Regardless, the flavor and texture of these cookies is fantastic and the recipe is a definite keeper.   


Recipe from Mel's Kitchen Cafe.

INGREDIENTS

2 1/2 cups flour
1/2 teaspoon salt
1 teaspoon baking powder
1 teaspoon baking soda
1 cup butter, softened to room temperature
1 cups creamy peanut butter
1 1/2 cups brown sugar
1/2 cup granulated sugar
2 large eggs
1 teaspoon vanilla

DIRECTIONS

1. Preheat the oven to 350 degrees.
2. Combine dry ingredients in a medium bowl and set aside.
3. In a large mixer bowl, beat together the butter and peanut butter until light and fluffy, 1-2 minutes, scraping down the sides of the bowl as needed.
4. Add the brown sugar and granulated sugar and mix until combined.  Beat in the eggs and vanilla.
5. Add the dry ingredients and mix until combined.
6. Scoop the dough and roll into 1- or 2-inch balls.  Place on parchment-lined (or lightly greased) baking sheets, a couple inches apart.
7. Bake for 10-11 minutes until puffed.  Don't overbake. (My oven always takes longer so I was more at the 14 minute mark before these were actually done and it was perfect - they stayed soft and I actually still had to give them a couple of minutes cooling on the baking sheet before transferring them to cooling racks or they would fall apart.
8. Remove from the oven and immediately lightly press each cookie to flatten slightly with the bottom of a drinking glass.
9. Transfer to a cooling rack to cool completely.  Mel says the cookies freeze well and taste great straight from the freezer.

Sunday, January 31, 2016

Belgian Waffles

Belgian waffles are quite different from American waffles and its not just because of the waffle iron used. Belgian waffles are sweeter and have more fat in the batter, which makes them richer and more of a dessert (how they are eaten in Belgium from vendors on the street). I love them topped with whipped cream and raspberries but strawberries, blueberries, bananas or fried apples are other delicious options to try as well.


Ingredients

  • 2 cups flour
  • 3/4 cup sugar
  • 3 1/2 teaspoons baking powder
  • 2 large eggs, separated
  • 1 1/2 cups milk
  • 1 cup butter, melted
  • 1 teaspoon vanilla
Directions

  • Combine flour, sugar and baking powder in a bowl. In another bowl, lightly beat egg yolks. Add milk, butter and vanilla; mix well. Stir into dry ingredients just until combined. Beat egg whites until stiff peaks form; gently fold into batter.
  • Bake in a preheated waffle iron according to manufacturer’s directions until golden brown. Top with fruit and whipped cream or syrup.
NOTE:  Another variation to try would be to add 1 teaspoon of cinnamon, some imitation maple flavoring extract and diced apples to the batter before cooking then serving with maple or cinnamon syrup.

How to Temper Chocolate: Seeding Method

I adore chocolate-covered strawberries.  But they are so expensive!  I have seen them priced around $4 dollars for just one strawberry even.  So I figured, why not learn how to make them myself?  I have attempted chocolate dipped treats in the past using a method where you melt chocolate chips with a little shortening and it is sort of okay, but definitely nowhere close to the quality of chocolate you would get from a real chocolatier at a fine candy store.  And I'm kind of a snob when it comes to chocolate.  

I also put myself in charge of teaching how to make chocolate-dipped strawberries as part of our Relief Society Valentine's Day themed activity, so, you know, I kind of sort of had to learn.  

Properly tempered chocolate sets with a nice, slightly glossy and smooth finish and has a nice snap to the chocolate.  And it doesn't need to be refrigerated for it to set up.  Improperly tempered, lower quality chocolate used for dipping (like using chocolate chips for melting) will result in a softer, chewy set with no snap.  

So, here's what you do to properly temper chocolate.  Start with good quality chocolate, either in block form or wafers.  Trader Joe's sells 1 lb. blocks of dark or milk chocolate that are excellent at a very good price of $5/block.  Be cautious about buying "melting wafers" from the craft store - often they aren't very quality chocolate to begin with and the white candy melts are just that - candy melts and not chocolate at all.  You can also order your chocolate at numerous places online to get good quality chocolate.  Amazon has many good options if there isn't a Trader Joe's nearby.  

All my research stated that it is best to melt at least 1 pound of a chocolate at a temper as it is easier to temper and maintain temper in a pound of chocolate than in smaller amounts.  You start by chopping 3/4 of your total chocolate into small bits, reserving 1/4 of the chocolate block in bar form for later.    


Next, put your chopped chocolate into a clean, dry (it MUST be dry - any water will cause the chocolate to seize and clump) bowl and set it over a pan of hot water.  I brought my pan of water up to a simmer and then turned off the heat so it would be hot but no longer simmering and definitely not boiling for this step.  Then I carefully set my bowl right down into the water, making sure that the water didn't come close to the rim of my bowl, and then just let it sit for a while, allowing the chocolate to melt about halfway before any stirring.  I also saw methods where you microwaved the chocolate at short intervals, stirring in between, or putting the chocolate in a double boiler, but I like the glass bowl set directly in the hot water method best.

When the chocolate is about halfway melted, using a dry rubber spatula to stir the chocolate, helping it to continue melting.  I took the bowl out of the water first and set it on a dry towel on the counter to make sure I didn't slosh any water into it.  Then place the bowl back into the hot water and allow the chocolate to continue melting until it is completely melted, stirring periodically as necessary.

Once the chocolate is completely melted, use a digital thermometer to check the temperature of the chocolate, watching closely until it reaches 115 degrees F (for dark chocolate) or 110 degrees F (for milk or white chocolate).  The chocolate should not go over this temperature or you risk burning it, which is why a thermometer is so crucial.

At this point, remove the bowl of melted chocolate from the hot water and add the reserved 1/4 chunk of chocolate to your bowl or melted chocolate, stirring gently and almost constantly to melt the big chunk.  You can sort of scrape it and agitate it with your spatula to incorporate it into the melted chocolate.  The warm chocolate will melt the block of chocolate and the block of chocolate will help gently bring down the temperature of the warm chocolate.  Adding a block of properly tempered chocolate and continuous stirring encourages the formation of the proper crystalline structure necessary for properly tempered chocolate.  I know, sounds weird and hokey, but I saw this explanation over and over and it is one of those science of baking things that are kind of cool to know.

Continue to stir and cool the chocolate, taking its temperature periodically, until the chocolate reaches 90 degrees F (for dark chocolate) or 87 degrees F (for milk or white chocolate).  At this point, you can test the chocolate's temper by smearing a small amount of your melted, tempered chocolate on a piece of parchment or waxed paper and watching to see if it sets properly.  If you tempered everything correctly, your smear of chocolate should begin to set within juts a few minutes.  It will start to lose its shine and take on a slightly more matte look, then begin to set around the edges.  In a cool room, properly tempered chocolate will set within about 4-6 minutes.  Don't be tempted to stick your chocolate in the fridge to speed things up because that won't actually tell you whether your chocolate has been tempered properly.  If it doesn't seem to be properly tempered, continue to stir and cool the chocolate another 1-2 degrees, then test it again.  If it looks to be properly tempered, remove any remaining chunks of chocolate from your reserved 1/4 block if it hasn't melted completely and just set it to the side (you can reuse it and melt it again later).  Or just pop it in your mouth while you proceed to dip your strawberries.

Now your chocolate is tempered and ready for dipping and coating!  You can dip clean, dry (make sure they are totally dry!) strawberries, truffle centers, almonds - whatever you want!  While dipping, you need to keep your tempered chocolate warm, by stirring it with your spatula periodically and watching its temperature.  If it falls down in the 85 degree range, set your bowl of melted, tempered chocolate back in the hot water for 1-3 seconds (seriously, it doesn't take very long) to let the chocolate at the bottom of the bowl warm up a bit, then stir it again to mix the warm chocolate from the bottom with the cooler chocolate on top.  But don't let the chocolate go up over 90 degrees or you will need to start the tempering process over again!

I dipped my strawberries into the tempered chocolate, then gently scraped the bottom back into the bowl to remove some of the excess chocolate so it wouldn't puddle at the base of each strawberry on the parchment-lined baking sheet.  When you finish dipping all the strawberries (or truffle centers or whatever you are dipping), you can pour the remaining tempered chocolate onto parchment paper and allow it to set back into a block form and store it in a cool, dry place to be used the next time you want to temper chocolate.  Or you can pour it over some raw almonds or other nuts to make yourself a delicious chocolate bar, because why waste your perfectly tempered chocolate?


I looked at a number of tutorials, sites, and recipe books when figuring out this process, but the two that were most helpful and that I followed most closely are here and here.  The first site even has a video explanation of the process I set out above.

Sunday, January 24, 2016

Best Fudgy Brownies


One of Paul’s all-time favorite desserts is a brownie sundae with hot fudge. I like my brownies loaded with walnuts and served with a tall glass of cold milk. This recipe doubles easily to make a 9x13-inch pan if you need brownies for a crowd.


Best Fudgy Brownies

Ingredients

  • 10 tablespoons (1 1/4 sticks) butter
  • 1 1/4 cups sugar (half granulated, half brown sugar)
  • 1/2 cup plus 2 tablespoons unsweetened cocoa powder (natural or Dutch-process)
  • 1/2 teaspoon salt
  • 1 teaspoon pure vanilla extract
  • 2 large eggs
  • 3/4 cup all-purpose flour
  • 1/4 teaspoon baking soda (this will give the brownies a glossy, crackly crust)
  • 1/2 cup chocolate chips
Directions

  • 1
    Position a rack in the lower third of the oven and preheat the oven to 325 degrees. Line the bottom and sides of an 8×8-inch square baking pan with parchment paper or foil, leaving an overhang on two opposite sides. Lightly grease with cooking spray and set aside.
  • 2
    Combine the butter, sugar, cocoa, and salt in a medium microwave-safe bowl. Microwave for one minute intervals, stirring in between, until the butter is melted and the mixture is smooth. Set the mixture aside until it cools slightly (is warm to the touch not hot). It will look gritty but it will become smooth once the other ingredients are added.
  • 3
    Stir in the vanilla with a wooden spoon or rubber spatula. Add the eggs one at a time, stirring vigorously after each one. When the batter looks thick, shiny, and well blended, add the flour and stir until you cannot see it any longer, then beat vigorously for 40 strokes with the wooden spoon or a rubber spatula. Spread evenly in the lined pan.
  • 4
    Bake until a toothpick inserted into the center emerges slightly moist with batter, 20 to 25 minutes. Let cool completely on a rack. After the brownies are cooled completely, I like to throw the pan in the refrigerator - cold brownies cut much easier and taste heavenly. Lift up the ends of the parchment or foil liner, and transfer the brownies to a cutting board. Cut into squares and serve.

Sunday, June 7, 2015

Peach Pie Perfection

 
Peaches are my favorite fruit.  But because I love them so much, it is difficult actually making anything with them because I tend to eat them all before I get around to baking with them!  But this peach pie is absolutely worth a little bit of patience.  Both Paul and I used to think we weren't much of peach pie people anyway, but after making this pie with gorgeous, orangey-pink peaches from the local farmer's market, we have been converted.  In fact, this may be my new favorite pie. 


Peach Pie

1 double-crust pie crust
3 pounds of fresh peaches (about 6-7 large peaches), peeled and sliced into 1/4-inch slices
1/2 to 3/4 cups sugar, depending on the sweetness of the peaches
2 tablespoons cornstarch
2 tablespoons flour
1/2 teaspoon cinnamon
a pinch of allspice
1/4 teaspoon salt
1 teaspoon vanilla
2 tablespoons butter
1 egg, lightly beaten
sanding sugar

Prepare pie crust according to recipe, then line pie plate with the bottom crust.  To easily peel peaches, gently lower them into a large pot of boiling water for about 60 seconds, then remove to a pan and use your fingers to rub off the skin.  Remove peach pits and slice peaches into 1/4-inch slices. 

Place sliced peaches in a large bowl, then gently toss with sugar, cornstarch, flour, spices, salt and vanilla.  Fill bottom pie shell with peach mixture and dot with butter.  Add top crust and crimp edges.  Cut a few slits in the top of the crust to allow the pie to vent and brush with egg wash and sprinkle with sanding sugar.

Bake in a 400 degree oven for 45-50 minutes or until juices are bubbling and the crust is nicely browned.  You may need to cover the crust edges with tinfoil to protect it from getting too brown.  Let the pie cool for at least 3 hours.  Serve with a big scoop of vanilla ice cream.

*Optional: Instead of a top crust, you could do a brown butter streusel using the follow recipe and technique.

Brown Butter Streusel Topping

1/3 cup pecans
1/2 cup butter
1 cup plus 2 tablespoons flour
1/2 cup granulated sugar
3 tablespoons dark brown sugar
1/4 teaspoon salt
Pinch cinnamon

Sprinkle the pecans on a baking sheet and toast for 5 minutes. Remove and set aside until cool enough to handle, then chop.

In a small, heavy-bottomed saucepan, melt a stick of butter over medium heat, stirring frequently. Cook until the butter turns golden-brown, being careful not to burn it. Set aside.
 
Whisk together the 1 cup plus 2 tablespoons flour, ½ cup sugar, 3 tablespoons dark brown sugar, ¼ teaspoon salt, and pinch of cinnamon. Mix in the pecans. Drizzle over the browned butter (which now should be slightly cooled) and mix until crumbs form.
 
Sprinkle and crumble the streusel over the pie filling until the pie filling is completely covered. Bake as directed above.


Saturday, May 16, 2015

Cherry Almond Cupcakes


A month or so before Clara's 4th birthday I started talking to her about what kind of cake she wanted and she consistently told me "cherry cupcakes!".  There was one day in there where she changed the request to blueberry cupcakes, but then went right back to cherry, so cherry it was. 

These cupcakes are actually an almond cupcake with fresh cherry frosting.  I found a lot of recipes for cherry cupcakes using maraschino cherries in the batter and frosting but I'm not a huge fan of maraschinos, especially in baked goods.  I'm glad I went with my gut on this and used fresh cherries instead, which are just coming into season in May.  I picked up some Brooks cherries (one of our favorite sweet varieties along with Rainiers) at the farmer's market on Thursday.


I thought I had chopped my cherries pretty well but I think I would go even farther next time and practically puree them to make the frosting to help release more of the juice because I feel like that is what caused the purple-pink liquid to seep out and ooze down the sides of the cupcakes.  They were still pretty but it just wasn't the effect I was going for.  Also, I would wait to add the cherry juice itself until after incorporating the chopped cherries and seeing how the frosting is holding up.  I might even try adding a cup of chopped cherries the almond cupcake batter as well and seeing how that would turn out, even though I loved the almond cupcake as it was. 

Cherry Almond Cupcakes (makes 18 cupcakes)

Cupcakes

1½ cups all-purpose flour
1½ teaspoons baking powder
½ teaspoon salt
1 cup sugar
½ cup butter, at room temperature
2 eggs
1½ teaspoons almond extract
1 cup buttermilk
 
Fresh Cherry Frosting
 
1 cup butter, at room temperature
3½ cups powdered sugar
¼ teaspoon salt
¼ teaspoon almond extract
1 cup fresh cherries, pitted and very finely chopped
 
Preheat the oven to 350F. Line 18 muffin cups with paper liners.
 
In a large bowl, combine the flour, baking powder and salt and mix to combine.
 
In the bowl of a stand mixer, beat together the sugar and butter until light and fluffy, about 2 minutes. Add in the eggs, one at a time, scraping down the bowl in between additions. Beat in the almond extract. Add one-third of the flour mixture, beat to combine, then half of the buttermilk. Add another one-third of the flour, the remaining buttermilk, then the remaining flour. Beat just until combined.
 
Fill the cupcake liners about ⅔ full of the batter. Bake in the preheated oven until a toothpick inserted in the center comes out clean, about 18 minutes. Remove from the pans and cool completely.
 
In the bowl of a stand mixer, beat the butter until light and fluffy, 2-3 minutes. Add in the powdered sugar, ½ cup at a time, mixing until completely combined. Beat in the salt and the almond extract, then turn the mixer to medium-high and beat until light and fluffy, about 2 minutes. Add in the cherries and any juices that may have accumulated. Beat on low until combined, then turn to medium-high and beat an additional 2-3 minutes. The frosting should be light and creamy and smooth.
 
Pipe the frosting on the cupcakes. Top with an additional cherry, if desired.

Black Forest Cherry Cupcakes


Black Forest Cherry Cupcakes

Cupcake

3 oz bittersweet chocolate, finely chopped
1/3 cup unsweetend cocoa powder (regular or Dutch-processed)
3/4 cup hot water
3/4 cup bread flour
3/4 cup granulated sugar
1/2 tsp salt
1/2 tsp baking soda
1/4 cup + 2 Tbsp canola oil
2 large eggs
2 tsp white vinegar
1 1/2 tsp vanilla extract
 
Filling and Topping
 
1 1/4 cups cherry pie filling, store bought or homemade
1 1/2 cups heavy cream
1/4 cup granulated sugar
Finely chopped chocolate or real chocolate sprinkles, for garnish
 
Preheat oven to 350 degrees. Place the chopped chocolate and cocoa powder in a medium bowl, then pour hot water over chocolate mixture and whisk until smooth. Transfer bowl to refrigerator and chill 20 minutes, stirring once halfway through chilling, until cooled (or 10 in freezer stirring once).
 
Meanwhile, in a mixing bowl, whisk together flour, granulated sugar, salt and baking soda. In a separate mixing bowl, whisk together canola oil, eggs, vinegar and vanilla. Pour chocolate mixture into oil mixture and stir until well combined, then add flour mixture and whisk until smooth.
 
Divide batter evenly among 12 paper lined muffin cups (about 1/4 cup in each). Bake in preheated oven until toothpick inserted into center comes out clean, 17 - 19 minutes. Allow cupcakes to cool in baking tin several minutes then transfer to a wire rack. Cool completely.
 
Cut a hole in the centers of each cupcake (big enough to fit 1 1/2 Tbsp filling, mine was slightly heaping out the top). Add about 1 1/2 - 2 Tbsp cherry pie filling to holes in cupcakes.
 
In a mixing bowl, using an electric hand mixer, whip heavy cream on high speed until soft peaks form. Add 1/4 cup granulated sugar and whisk until stiff peaks form. Pipe whipped cream over cupcakes then top each with a cherry and garnish with finely chopped chocolate or sprinkles. Store in an airtight container in refrigerator, allow to rest at room temperature about 20 minutes before serving.

Friday, April 24, 2015

Lemon Meringue Cheesecake


So, here's the thing about this cheesecake:  it was delicious.  The texture, creaminess, and lemony brightness were spot on.  The meringue was amazing.  My one complaint was that the lemon curd didn't set up as much as I wanted.  I was hoping for a thicker curd that would create a layer on top of the cheesecake so that when I cut into it I would see a layer of yellow, instead of having it all drip down the sides.  But at least it tasted good.  I plan to continue to experiment with the curd portion of this recipe to see whether I can come up with what I had been envisioning.  But until then, this is a rich and impressive dessert.

Lemon Meringue Cheesecake

Graham Cracker Crust

2 1/2 cups graham cracker crumbs
1/3 cup sugar
6 tablespoons butter, melted

Combine all crust ingredients in a bowl. Press mixture into a 9" springform pan and up the sides, about one inch.

Bake for 10 minutes at 350 degrees and allow to cool.

Cheesecake Filling

4 (8 ounce) packages cream cheese, room temperature
1 1/2 cups granulated sugar
6 egg yolks (reserve whites for meringue)
2 tablespoons flour
1 cup sour cream
2 tablespoons lemon zest
2 teaspoons lemon juice

In a bowl fitted with paddle attachment beat cream cheese and sugar together until combined and smooth. Add in egg yolks and beat until mixture is just combined, scraping sides as necessary.
 
Add in flour, sour cream and lemon zest and mix until smooth.
 
Pour mixture over prepared crust. Bake for 75 minutes at 325 degrees. Then turn off oven and leave cheesecake in the warm oven with the door closed for 4 hours.
 
Finally, remove it from oven, run a knife along the edges to loosen from pan and chill for 6 hours, or overnight.

Lemon Curd

4 egg yolks
1 cup sugar
4 tablespoons fresh lemon juice
2 teaspoons lemon zest
4 tablespoons butter

In a double boiler over simmering water, whisk all ingredients for 8-10 minutes. Press through a fie mesh strainer into a small bowl. Cover with plastic wrap, pressing to the surface of lemon curd so to avoid a skin forming. Cool to room temperature. Place in refrigerator to cool completely and continue to thicken.

Meringue Topping

6 egg whites
1 1/2 cups granulated sugar
1/4 teaspoon cream of tartar

Whisk 6 reserved egg whites with sugar and cream of tartar. Place over a double boiler and stirring constantly heat mixture until it reaches 140° on candy thermometer. Pour mixture immediately into bowl of stand mixer, fitted with whisk attachment and beat for 10 minutes or until glossy and stiff peaks form.
 
Spread the meringue over chilled cheesecake and place under broiler in oven or use a kitchen torch just until the top of the meringue is lightly browned.

Thursday, April 16, 2015

Blueberry Custard Pie


A couple of years ago we were invited to attend a Pi Day (March 14 - 3.14) pie party.  We moved after that and decided to host our own Pi Day pie party for 3.14.15.  We invited a bunch of friends and told everybody to bring a pie to share, then we ate, played games, and swapped leftover pie to take home.  We even did awards for things like best crust, best filling, and the pie most likely to bring about world peace.  This blueberry custard pie won the world peace award and it was totally deserving.  I mean, juicy blueberries and a streusel topping in a creamy filling and buttery pie crust?  How could anyone resist that kind of bliss?  My friend Christina was kind enough to share the recipe with me and I made it for Easter dinner a few weeks later.  It's a new favorite.


Blueberry Custard Pie

Filling:
 
1 cup (8 ounces) sour cream
3/4 cup sugar
1 egg
2 tablespoons flour
2 teaspoons vanilla extract
1/4 teaspoon salt
2 1/2 cups fresh blueberries
 
Streusel Topping:
 
1/2 cup brown sugar
1/3 cup flour
1/4 cup butter, softened
1/2 cup chopped pecans
 
Preheat oven to 400 degrees F.  In a large bowl, mix the sour cream, 3/4 cup sugar, egg, 2 tablespoons flour, vanilla extract and salt with a spoon until smooth. Gently fold the blueberries into the sour cream mixture. Spoon the filling into the unbaked pie crust.  Bake in the preheated oven for 25 minutes.
 
While the filling is baking, prepare the streusel topping: In a medium bowl combine the brown sugar and flour. Mix the butter in (I always use my hands) until the mixture resembles course sand. Fold in the chopped pecans. After the filling has baked 25 minutes, sprinkle the streusel crunch topping over the top of the pie. Bake an additional 15-20 minutes or until filling is set and topping is brown.  Make sure your crust doesn't burn. Either use a crust shield or make a loose foil tent towards the end of baking.
 
Remove from oven and let pie sit for at least 10-15 minutes. Serve pie warm or chill it and serve cold.

Friday, April 3, 2015

Strawberry Rhubarb Pie

 
There is something amazingly right and good and true about Strawberry Rhubarb Pie.  I mean, rhubarb is this crazy vegetable with poisonous leaves and insanely sour/tart stems but if you add a little sugar and mix them with berries in a pie crust, they create the most wonderful sweet-tart pie that you can possibly imagine.  This just may be my favorite pie ever.  And the girls are definitely huge fans.  I dished up a slice with a scoop of vanilla ice cream for a treat the other afternoon and sat on the back step to watch the girls play in the yard while I ate it.  Except I couldn't even get a bite to a myself because Rose and Clara hovered right next to me and devoured the whole thing spoonful by spoonful while making happy "mmmmmmm" sounds. 
 

The filling is made with equal parts strawberries and chopped rhubarb with a little cinnamon for warmth and depth, lemon juice and zest for brightness, and tapioca for thickening.  And I think this is the perfect pie for a lattice-top crust, which never fails to impress. 


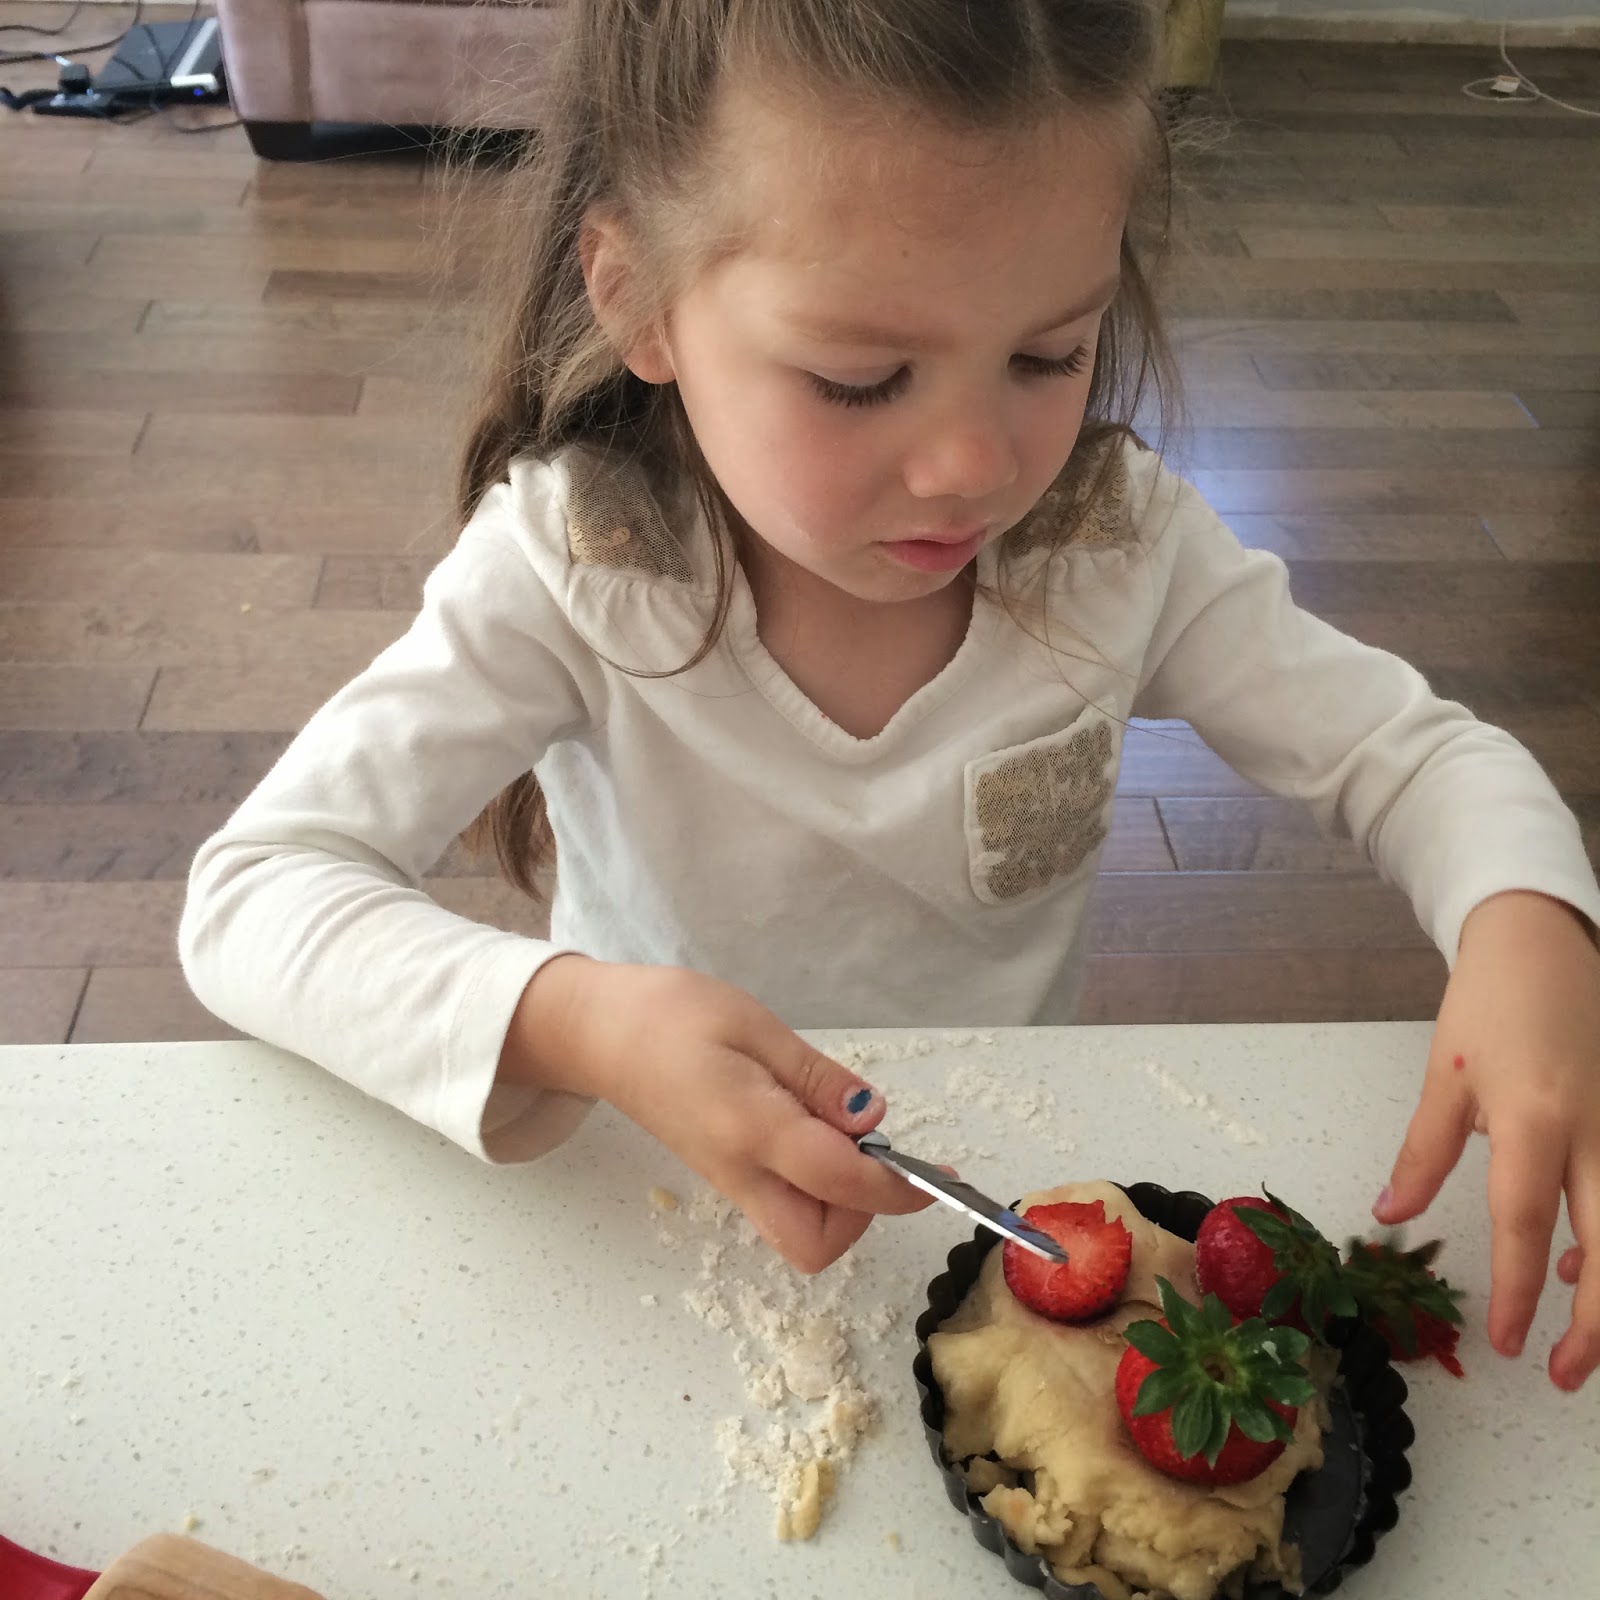
Clara loves when I make pies because I always give her the extra dough scraps from the crust and she uses her little rolling pin and a mini tart pan to make her own "pies". 


When the perfectly golden pie comes out of the oven with the tangy and sweet filling bubbling up out of the holes in the lattice top, it is a powerful thing.  I'm pretty sure this pie could bring about world peace. 


Strawberry Rhubarb Pie

2 1/2 cups chopped red rhubarb, fresh
2 1/2 cups strawberries, washed, hulled and cut into pieces about the same size as the rhubarb
1 1/2 cups sugar
3 tablespoons minute tapioca
1 tablespoon all-purpose flour
1/2 teaspoon lemon zest
1/2 teaspoon lemon juice
1/2 teaspoon ground cinnamon
1 teaspoon vanilla extract
3 tablespoons butter, cubed small
1 egg beaten with 1 teaspoon water
Sugar for sprinkling on top
 
Prepare double-crust pie crust recipe.  Roll out one half of the crust and cover the bottom of a pie dish, while reserving the other half of the dough for the top crust. 
 
Mix the rhubarb, strawberries, sugar, tapioca, flour, lemon zest and juice, cinnamon, and vanilla. Mix well in a large bowl and pour out into prepared crust. Dot the top of the filling with the butter.  Roll out the other piece of dough and place over filling either as a solid crust or by cutting into strips and laying them out in a lattice pattern. Crimp to seal edges. Brush with egg wash and sprinkle with sugar. Loosely cover edges with foil and bake at 425 degrees F for 15 minutes. Decrease temperature to 375 degrees F and bake for an additional 45 to 50 minutes, or until the filling starts bubbling and crust is golden brown.
 
Let the pie cool for at least 2 hours before cutting and serving.

Sunday, March 29, 2015

Strawberry Ice Cream


I love, love, love a good strawberry milkshake made with real strawberry ice cream (give me a strawberry shake over a chocolate or vanilla one any day) and this recipe is perfect for that.  And there is just something so pure and good and innocent about strawberry ice cream.  It has always been one of my most favorite flavors and it is also my Grandpa Johnson's favorite (my mom's dad) and whenever I eat strawberry ice cream I remember that.
 
Strawberry Ice Cream
 
3/4 cup half-and-half
3/4 cup milk
1 cup sugar
1 teaspoon vanilla
3 large egg yolks
1 1/2 cups heavy cream
1/2 pound strawberries, hulled
2 tablespoons sugar

Stir together the half-and-half, milk, and cream with 1/2 cup of the sugar in a medium saucepan over medium-low heat. Heat the mixture until it's hot but not simmering or boiling.  In a large bowl, beat the egg yolks and remaining 1/2 cup of sugar vigorously with a whisk until they start to lighten in color, about 2 minutes.

Next, scoop about 1/2 a cup of the hot cream mixture and slowly whisk it into the bowl with the egg yolks, to temper the eggs before adding them to the pan. Repeat with another half cup of the cream mixture, making sure to whisk the whole time.

Pour the tempered yolks into the saucepan with the rest of the cream mixture and stir gently with a wooden spoon for about 2 to 4 minutes, cooking it slowly until it's just thick enough to coat the spoon. 
our the thick liquid through a fine mesh strainer and into a clean bowl. Refrigerate for 2 hours or longer until chilled.

Meanwhile, combine the strawberries and 2 tablespoons of sugar in a blender. Puree until smooth (or you can stop just short of smooth if you want a little texture.) Pour the pureed strawberries into the chilled custard mixture and stir just before freezing the ice cream.

Now pour this mixture into your ice cream maker and freeze it according to its directions.  After churning, transfer the soft ice cream to a freezer-safe container and place in the freezer to cure for at least 4 hours. 


Saturday, March 28, 2015

Razzleberry Pie


Razzleberry Pie

1-1/3 cups sugar
2 tablespoons quick-cooking tapioca
2 tablespoons cornstarch
5 cups fresh or frozen unsweetened raspberries, thawed                                                
1 tablespoon butter
 
Prepare pie crust.  Meanwhile, in another large bowl, combine the sugar, tapioca, cornstarch and raspberries; let stand for 15 minutes. 
 
On a lightly floured surface, roll out larger ball of dough to fit a 9-in. pie plate. Transfer dough to pie plate; trim even with edge. Add raspberry filling; dot with butter.  Roll out remaining dough to fit top of pie; place over filling. Trim, seal and flute edges. Cut slits in top. Brush with milk or egg wash.  Bake at 350° for 50-55 minutes or until crust is golden brown and filling is bubbly.
 

Marshmallow Ice Cream Topping


I love a simple ice cream sundae with rocky road ice cream or strawberry ice cream and gooey marshmallow topping dripping down the sides.  This is super easy to make and can also be used as a fruit dip for a parties.

Marshmallow Ice Cream Topping

1 teaspoon unflavored powdered gelatin
1 cup cold water, divided
1 1/2 cups sugar
1 cup light corn syrup
Pinch of salt
1 teaspoon vanilla

In a mixing bowl with a whisk attachment, beat together gelatin and 1/2 cup cold water for a few seconds then let gelatin bloom. In a saucepan, using a candy thermometer, bring sugar, corn syrup, salt and remaining 1/2 cup cold water to a boil over medium-high heat. Continue cooking, without stirring, until the temperature reaches 240 degrees. Remove from heat and pour the syrup over the gelatin mixture. Add vanilla extract. Beat on low speed for 2 minutes. Then increase the speed to high and beat until the mixture becomes thick, white and shiny. Pour into a glass container and cover with a lid. Store in the refrigerator.