Friday, April 24, 2015

Lemon Meringue Cheesecake


So, here's the thing about this cheesecake:  it was delicious.  The texture, creaminess, and lemony brightness were spot on.  The meringue was amazing.  My one complaint was that the lemon curd didn't set up as much as I wanted.  I was hoping for a thicker curd that would create a layer on top of the cheesecake so that when I cut into it I would see a layer of yellow, instead of having it all drip down the sides.  But at least it tasted good.  I plan to continue to experiment with the curd portion of this recipe to see whether I can come up with what I had been envisioning.  But until then, this is a rich and impressive dessert.

Lemon Meringue Cheesecake

Graham Cracker Crust

2 1/2 cups graham cracker crumbs
1/3 cup sugar
6 tablespoons butter, melted

Combine all crust ingredients in a bowl. Press mixture into a 9" springform pan and up the sides, about one inch.

Bake for 10 minutes at 350 degrees and allow to cool.

Cheesecake Filling

4 (8 ounce) packages cream cheese, room temperature
1 1/2 cups granulated sugar
6 egg yolks (reserve whites for meringue)
2 tablespoons flour
1 cup sour cream
2 tablespoons lemon zest
2 teaspoons lemon juice

In a bowl fitted with paddle attachment beat cream cheese and sugar together until combined and smooth. Add in egg yolks and beat until mixture is just combined, scraping sides as necessary.
 
Add in flour, sour cream and lemon zest and mix until smooth.
 
Pour mixture over prepared crust. Bake for 75 minutes at 325 degrees. Then turn off oven and leave cheesecake in the warm oven with the door closed for 4 hours.
 
Finally, remove it from oven, run a knife along the edges to loosen from pan and chill for 6 hours, or overnight.

Lemon Curd

4 egg yolks
1 cup sugar
4 tablespoons fresh lemon juice
2 teaspoons lemon zest
4 tablespoons butter

In a double boiler over simmering water, whisk all ingredients for 8-10 minutes. Press through a fie mesh strainer into a small bowl. Cover with plastic wrap, pressing to the surface of lemon curd so to avoid a skin forming. Cool to room temperature. Place in refrigerator to cool completely and continue to thicken.

Meringue Topping

6 egg whites
1 1/2 cups granulated sugar
1/4 teaspoon cream of tartar

Whisk 6 reserved egg whites with sugar and cream of tartar. Place over a double boiler and stirring constantly heat mixture until it reaches 140° on candy thermometer. Pour mixture immediately into bowl of stand mixer, fitted with whisk attachment and beat for 10 minutes or until glossy and stiff peaks form.
 
Spread the meringue over chilled cheesecake and place under broiler in oven or use a kitchen torch just until the top of the meringue is lightly browned.

Friday, April 17, 2015

Grilled Shrimp Tacos with Avocado-Corn Salsa

 
There is something about shrimp tacos that is just so right and good about the world.  When I am eating this, it is not hard at all to imagine myself on a beach in Mexico and feeling completely transported. The flavors of the filling and salsa are so fresh and bright and pair perfectly with a lightly toasted corn tortilla from the grill.  And it would certainly change up a "taco Tuesday" rut with a seafood approach.  I see us eating this all summer long.


Grilled Shrimp Tacos with Avocado-Corn Salsa

Salsa

4 ears white or yellow corn, shucked (or about 1 cup frozen corn)
4 medium scallions, thinly sliced (white and light green parts only)
3 medium tomatoes, cored, seeded, and cut into small dice (or just one can of diced tomatoes, drained)
3 tablespoons freshly squeezed lime juice (from about 2 medium limes), plus more as needed
2 tablespoons finely chopped fresh cilantro
1 serrano chile, stemmed and finely chopped
1 1/2 teaspoons kosher salt, plus more as needed
2 medium avocados
 
Tacos
 
2 tablespoons freshly squeezed lime juice (from about 2 medium limes)
2 tablespoons olive oil
4 teaspoons chipotle powder
1/2 teaspoon kosher salt
1/4 teaspoon ground cumin
2 pounds peeled and deveined large shrimp (about 45 shrimp)
10 (12-inch) skewers (soak wooden skewers in water for 30 minutes to avoid burning on the grill)
16 grilled or warmed corn tortillas
 
Remove the corn kernels from the cobs: Place a large container on a damp towel. Fold a paper towel into fourths and place it inside the container. Stand 1 ear of corn on the paper towel, using the stem as a handle. Using a paring knife, slice downward, letting the kernels fall into the container. Rotate the cob and continue until all the kernels have been removed; discard the cob. Repeat with the remaining corn. Discard the paper towel.  Or just skip this whole process and just use about 1 cup of frozen corn.
 
Add the scallions, tomatoes, measured lime juice, cilantro, serrano, and measured salt and stir to combine.  Halve and pit the avocados. Using a paring knife, score the flesh of the avocado halves in a 1/4-inch-wide crosshatch pattern (be careful not to cut through the skin).  Using a spoon, scoop the avocado pieces into the corn mixture and gently fold to combine.  Taste and add more lime juice or salt as needed; set aside.
 
Heat an outdoor grill to high (about 450°F to 550°F). Meanwhile, assemble the shrimp.  Whisk the lime juice, oil, chipotle powder, salt, and cumin together in a large bowl. Add the shrimp and toss to combine.  Skewer each shrimp through the tail and head ends, leaving about 1/4 inch of space between each shrimp. Transfer the skewers to a baking sheet.
 
Place the skewers in a single layer on the grill without touching. Close the grill and cook until grill marks appear on the bottom, about 4 minutes. Flip the skewers, close the grill, and cook until the shrimp are just firm, about 1 minute more. Transfer the skewers to a clean baking sheet.
 
Remove and discard the skewers, transfer the shrimp to a cutting board, and coarsely chop. Place in a serving bowl.  Serve the shrimp with the tortillas and salsa as well as sour cream and guacamole, if you want (which I do).

Thursday, April 16, 2015

Cranberry Apple Pie (or Crumble)


I LOVE this as a crumble and I LOVE this as a pie.  The filling is the same and really you can't go wrong either way you decide to make it.  The cranberries add bursts of tartness that are so delicious with the buttery crumble topping and delicately spiced sweet apples. With a generous scoop of vanilla ice cream, this dessert is heavenly. And okay, I love eating it for breakfast the next morning too.


Cranberry Apple Pie (or Crumble)

1 recipe double-crust pie crust (if making into a pie) or 1 recipe Oat Crumble Topping (below)

Filling

8 - 10 large apples, peeled, cored, and sliced 1/4-inch thick (3 1/2 pounds prepped)
2 cups cranberries, fresh or frozen
1 1/3 cups granulated sugar
2 tablespoons cornstarch
2 teaspoons ground cinnamon
 
Oat Crumble Topping
 
2 cups rolled oats
1 1/2 cups flour
1 1/3 cups packed brown sugar
1/2 teaspoon fine sea salt
3/4 cup unsalted butter, melted
 
Preheat the oven to 375 degrees. Butter a large rectangular baking dish (if making a crumble) or prepare pie pastry (if making a pie).
              
To make topping, mix the oats, flour, brown sugar, and salt together in a bowl. Stir in the butter, then press the topping together with your hands to form small clumps. Put the topping in the freezer while you assemble the filling.
              
To make the fruit filling, toss the apples, cranberries, sugar, cornstarch, and cinnamon together in a large bowl. Transfer the filling to the prepared pan and spread it out, pressing the fruit down into the corners.  If making a pie, dot with butter before topping with the crust and crimping the edges and brushing the top crust with an egg wash.
 
Press the oat crumble evenly over the fruit, then bake for 60 - 70 minutes, or until the crumble is lightly golden and the filling is bubbling up in the corners (or the pie crust is golden brown - you may have to cover the edges of the pie to prevent burning). Cool for 20 minutes or so before serving, then top with a scoop of vanilla ice cream.

Chicago Deep Dish Pizza

 
Okay, so I have never been to Chicago and have never truly had Chicago Deep Dish Pizza.  But this recipe is supposedly as close as you can possibly get to the real thing.  It is from the America's Test Kitchen cookbook, which is basically my favorite cookbook ever.  This isn't like any other normal kind of pizza.  The crust has cornmeal and is laminated with butter, and the position of the cheese and sauce are reversed so that the crust doesn't get soggy.  You eat it with a knife and a fork instead of just using your hands.  But it is hands down one of the best things I make.  At least in my opinion.  And while I actually prefer it with just cheese, which makes it a meatless, vegetarian meal, you can add sausage, peppers, carmelized onions - basically any pizza toppings you can think of.

The laminating process is cathartic for me.  You get to roll out dough, spread it with soft butter, then fold it in out itself, let it rose and roll it out again.  It creates wonderful, buttery layers of crust that are totally unlike regular pizza.


And the homemade sauce is unbelievable.  I mean, its basically just tomatoes and fresh basil and garlic, but wow, it is just so, so good.


If you decide to do a sausage pizza, just sprinkle small chunks of sausage over the cheese layer before topping with sauce and baking the pizza.  The sausage will cook through in the time that it takes for the pizza to cook.  Of you can do the cheese layer, a sauce layer, and then put the toppings on top so you can see them.  It really doesn't matter.


Chicago Deep Dish Pizza (makes two 9-inch pizzas, serving 4-6)

Dough

3 1/4 cups (16 1/4 ounces) unbleached all-purpose flour
1/2 cup (2 3/4 ounces) yellow cornmeal
1 1/2 teaspoons table salt
2 teaspoons sugar
2 1/4 teaspoons instant or rapid-rise yeast
1 1/4 cups water (10 ounces), room temperature
3 tablespoons unsalted butter , melted, plus 4 tablespoons, softened
1 teaspoon plus 4 tablespoons olive oil

Sauce

2 tablespoons unsalted butter
1/4 cup grated onion , from 1 medium onion (note, we left this out)
1/4 teaspoon dried oregano
Table salt
2 medium garlic cloves , minced or pressed through garlic press (about 2 teaspoons)
1 (28-ounce) can crushed tomatoes (see note)
1/4 teaspoon sugar
2 tablespoons coarsely chopped fresh basil leaves
1 tablespoon extra-virgin olive oil
Ground black pepper

Toppings

1 pound mozzarella cheese , shredded (about 4 cups)
1/2 ounce grated Parmesan cheese (about 1/4 cup)
1/2 pound bulk Italian sausage
Pepperoni
Caramelized onions
Yellow, green or red peppers
Spinach
Mushrooms
Olives

FOR THE DOUGH: Mix flour, cornmeal, salt, sugar, and yeast in bowl of stand mixer fitted with dough hook on low speed until incorporated, about 1 minute. Add water and melted butter and mix on low speed until fully combined, 1 to 2 minutes, scraping sides and bottom of bowl occasionally. Increase speed to medium and knead until dough is glossy and smooth and pulls away from sides of bowl, 4 to 5 minutes. (Dough will only pull away from sides while mixer is on. When mixer is off, dough will fall back to sides.)

Using fingers, coat large bowl with 1 teaspoon olive oil, rubbing excess oil from fingers onto blade of rubber spatula. Using oiled spatula, transfer dough to bowl, turning once to oil top; cover tightly with plastic wrap. Let rise at room temperature until nearly doubled in volume, 45 to 60 minutes.

FOR THE SAUCE: While dough rises, heat butter in medium saucepan over medium heat until melted. Add onion, oregano, and 1/2 teaspoon salt; cook, stirring occasionally, until liquid has evaporated and onion is golden brown, about 5 minutes. Add garlic and cook until fragrant, about 30 seconds. Stir in tomatoes and sugar, increase heat to high, and bring to simmer. Lower heat to medium-low and simmer until reduced to 2 1/2 cups, 25 to 30 minutes. Off heat, stir in basil and oil, then season with salt and pepper.

TO LAMINATE THE DOUGH: Adjust oven rack to lower position and heat oven to 425 degrees. Using rubber spatula, turn dough out onto dry work surface and roll into 15- by 12-inch rec-tangle. Using offset spatula, spread softened butter over surface of dough, leaving 1/2-inch border along edges. Starting at short end, roll dough into tight cylinder. With seam side down, flatten cylinder into 18- by 4-inch rectangle. Cut rectangle in half crosswise. Working with 1 half, fold into thirds like business letter; pinch seams together to form ball. Repeat with remaining half. Return balls to oiled bowl, cover tightly with plastic wrap, and let rise in refrigerator until nearly doubled in volume, 40 to 50 minutes.

Coat two 9-inch round cake pans with 2 tablespoons olive oil each. Transfer 1 dough ball to dry work surface and roll out into 13-inch disk about 1/4 inch thick. Transfer dough to pan by rolling dough loosely around rolling pin and unrolling into pan. Lightly press dough into pan, working into corners and 1 inch up sides. If dough resists stretching, let it relax 5 minutes before trying again. Repeat with remaining dough ball.

For each pizza, sprinkle 2 cups mozzarella evenly over surface of dough. Spread 1 1/4 cups tomato sauce over cheese and sprinkle 2 tablespoons Parmesan over sauce. Bake until crust is golden brown, 20 to 30 minutes. Remove pizza from oven and let rest 10 minutes before slicing and serving.

Blueberry Custard Pie


A couple of years ago we were invited to attend a Pi Day (March 14 - 3.14) pie party.  We moved after that and decided to host our own Pi Day pie party for 3.14.15.  We invited a bunch of friends and told everybody to bring a pie to share, then we ate, played games, and swapped leftover pie to take home.  We even did awards for things like best crust, best filling, and the pie most likely to bring about world peace.  This blueberry custard pie won the world peace award and it was totally deserving.  I mean, juicy blueberries and a streusel topping in a creamy filling and buttery pie crust?  How could anyone resist that kind of bliss?  My friend Christina was kind enough to share the recipe with me and I made it for Easter dinner a few weeks later.  It's a new favorite.


Blueberry Custard Pie

Filling:
 
1 cup (8 ounces) sour cream
3/4 cup sugar
1 egg
2 tablespoons flour
2 teaspoons vanilla extract
1/4 teaspoon salt
2 1/2 cups fresh blueberries
 
Streusel Topping:
 
1/2 cup brown sugar
1/3 cup flour
1/4 cup butter, softened
1/2 cup chopped pecans
 
Preheat oven to 400 degrees F.  In a large bowl, mix the sour cream, 3/4 cup sugar, egg, 2 tablespoons flour, vanilla extract and salt with a spoon until smooth. Gently fold the blueberries into the sour cream mixture. Spoon the filling into the unbaked pie crust.  Bake in the preheated oven for 25 minutes.
 
While the filling is baking, prepare the streusel topping: In a medium bowl combine the brown sugar and flour. Mix the butter in (I always use my hands) until the mixture resembles course sand. Fold in the chopped pecans. After the filling has baked 25 minutes, sprinkle the streusel crunch topping over the top of the pie. Bake an additional 15-20 minutes or until filling is set and topping is brown.  Make sure your crust doesn't burn. Either use a crust shield or make a loose foil tent towards the end of baking.
 
Remove from oven and let pie sit for at least 10-15 minutes. Serve pie warm or chill it and serve cold.

Andes Mint Cookies


I love the combination of mint and chocolate and as a kid always looked forward to my very own package of Andes mints in my Christmas stocking each year.  And then I discovered that you could buy packages of chopped Andes mints in the baking aisle right by the chocolate chips.  These cookies come from the recipe on the back of the package of chopped Andes mints and they are wonderfully delicious.  Definitely a favorite cookie of ours.

Andes Mint Cookies

2 2/3 cups sifted all-purpose flour
1 teaspoon baking soda
1 teaspoon baking powder
1/4 teaspoon salt
1/2 cup unsalted butter, softened
3/4 cup dark brown sugar
1/2 cup white granulated sugar
2 eggs
2 teaspoons vanilla extract
1 package (10 oz.) Andes Crème de Menthe Baking Chips

Preheat oven to 350 degrees F.  Line baking pan with parchment paper or silicone baking mat.
In a bowl, whisk together flour, baking soda, baking powder, and salt.  Set aside.  Place butter in the bowl of a stand mixer fitted with the paddle attachment. Cream the butter until light. Add both sugars and beat until light and fluffy. Add the eggs, one at a time.  Add the vanilla and beat until incorporated.

Add the Andes mint chips and then add the flour mixture gradually and mix just until the dough is incorporated. Wrap the cookie dough with plastic wrap and chill for at least one hour (or not - I always skip this step).  Roll into small balls and flatten slightly on a baking sheet for uniformly round cookies or just scoop and drop them with a spoon, which is fine too.

Bake for 8-10 minutes or until the edges start to turn golden brown and the centers are still soft.

Baked Pinto Bean and Swiss Chard Burritos


I like to try to do meatless meals at least one night a week at our house and these burritos are perfect when it comes to having a vegetarian option that in no way tastes or feels vegetarian.  If you didn't mention to somebody that you were doing a vegetarian dinner, they would have no clue and wouldn't miss the meat at all in these burritos.  One thing I really love about this recipe is the use of swiss chard, which I had never cooked before but had always wanted to try because it is almost always available at the farmer's market and it is so colorful and bright.  The recipe is from a new cookbook I bought called "The Complete Vegetarian Cookbook" by America's Test Kitchen, so I knew going into this recipe that it would probably turn out amazing and I can't wait to try out more meatless meals to add options to our vegetarian nights.
 

Baked Pinto Bean and Swiss Chard Burritos

2¼ cups vegetable broth, divided
¾ cup brown rice, rinsed
6 cloves garlic, minced, divided
1 teaspoon kosher salt
¼ cup minced fresh cilantro
1 tablespoon vegetable oil
1 onion, finely chopped
3 tablespoons tomato paste
1 teaspoon minced chipotle chile in adobo sauce
1 tablespoon ground cumin
1 teaspoon dried oregano
1 lb. Swiss chard, stemmed and sliced into 1-inch wide strips
1½ cups cooked pinto beans (1 15 oz. can), rinsed, divided
1 tablespoon lime juice
6-7 10-inch flour tortillas
10 oz. Monterey jack cheese, shredded (about 2½ cups), divided

In a small saucepan over medium-high heat, combine 1¼ cups of the broth, the rice, half of the garlic, and ½ teaspoon of the salt. Bring to a boil. Cover, reduce the heat to low and cook until the rice is tender and the broth has been absorbed, about 45 minutes. Remove from the heat and let sit, covered, for 10 minutes. Add the cilantro and fluff with a fork to incorporate. Cover to keep warm.

Meanwhile, in a Dutch oven, heat the oil over medium heat until shimmering. Add onion and cook until just beginning to brown, about 5 minutes. Stir in the tomato paste, chipotle, cumin, oregano, remaining garlic, and the remaining ½ teaspoon of salt. Cook until fragrant, about 1 minute. Add the chard and ½ cup of the broth, cover and simmer until the chard is tender, about 15 minutes.

Using a potato masher or a fork, coarsely mash half of the beans with the remaining ½ cup of broth in a bowl, then stir into the pot. Cook, stirring constantly, until the liquid is nearly evaporated, about 3 minutes. Off the heat, stir in the lime juice and remaining whole beans. Cover to keep warm.

Adjust an oven rack to 6 inches underneath the broiler element and heat the broiler. Wrap tortillas in a damp dish towel and microwave until warm and pliable, about 1 minute. Lay warm tortillas on a work surface. Mound warm rice, chard-bean mixture and 1½ cups of the cheese in the center of the tortillas, close to the bottom edge. Working with 1 tortilla at a time, fold the sides of the tortilla over the filling, then fold up the bottom of the tortilla, pulling back on it firmly to tightly wrap around the filling and into a burrito.

Place the burritos seam side down on a foil-lined baking sheet. Sprinkle the remaining 1 cup of cheese over the top. Broil until the cheese is melted and starting to brown, 3-5 minutes. Serve warm with sour cream and guacamole.

Friday, April 3, 2015

Basic Double-Crust or Single-Crust Pie Dough

I have tried pie crusts made with all shortening, ones made with all butter, and a number of other crusts.  But this one, from the America's Test Kitchen cookbook, has become my go-to pie crust.  It always gives great results and isn't as fussy as other crusts I have attempted in the past.  The recipe makes 2 generous crusts.


Basic Double-Crust Pie Dough

2 1/2 cups unbleached all-purpose flour, plus extra for the work surface
2 tablespoons sugar
1 teaspoon table salt
1/2 cup vegetable shortening
12 tablespoons (1 1/2 sticks) butter, cut into 1/4-inch pieces and chilled
6-8 tablespoons ice water

or

Basic Single-Crust Pie Dough

1 1/4 cups unbleached all-purpose flour, plus extra for the work surface
1 tablespoons sugar
1/2 teaspoon table salt
3 tablespoons vegetable shortening
5 tablespoons butter, cut into 1/4-inch pieces and chilled
4-6 tablespoons ice water

Mix the flour, sugar and salt until combined.  Add the shortening and cold butter and pulse in a food processor or cut in using a pastry cutter until the mixture resembles coarse crumbs.  Sprinkle 6 tablespoons of ice water over the mixture (for the double-crust pie - only start with 4 tablespoons if making the single-crust recipe), 2 tablespoons at a time, stirring lightly with a fork, just until the dough sticks together.  Use additional two tablespoons as needed, one at a time, until the dough just comes together.

If making the double-crust recipe, divide the dough into two even pieces and lay each piece on a sheet of plastic wrap and flatten into a disk.  Wrap each piece tightly in plastic wrap and refrigerate for 1 hour.  Before rolling the dough out, let it sit on the counter to soften slightly, about 10 minutes. 

Strawberry Rhubarb Pie

 
There is something amazingly right and good and true about Strawberry Rhubarb Pie.  I mean, rhubarb is this crazy vegetable with poisonous leaves and insanely sour/tart stems but if you add a little sugar and mix them with berries in a pie crust, they create the most wonderful sweet-tart pie that you can possibly imagine.  This just may be my favorite pie ever.  And the girls are definitely huge fans.  I dished up a slice with a scoop of vanilla ice cream for a treat the other afternoon and sat on the back step to watch the girls play in the yard while I ate it.  Except I couldn't even get a bite to a myself because Rose and Clara hovered right next to me and devoured the whole thing spoonful by spoonful while making happy "mmmmmmm" sounds. 
 

The filling is made with equal parts strawberries and chopped rhubarb with a little cinnamon for warmth and depth, lemon juice and zest for brightness, and tapioca for thickening.  And I think this is the perfect pie for a lattice-top crust, which never fails to impress. 


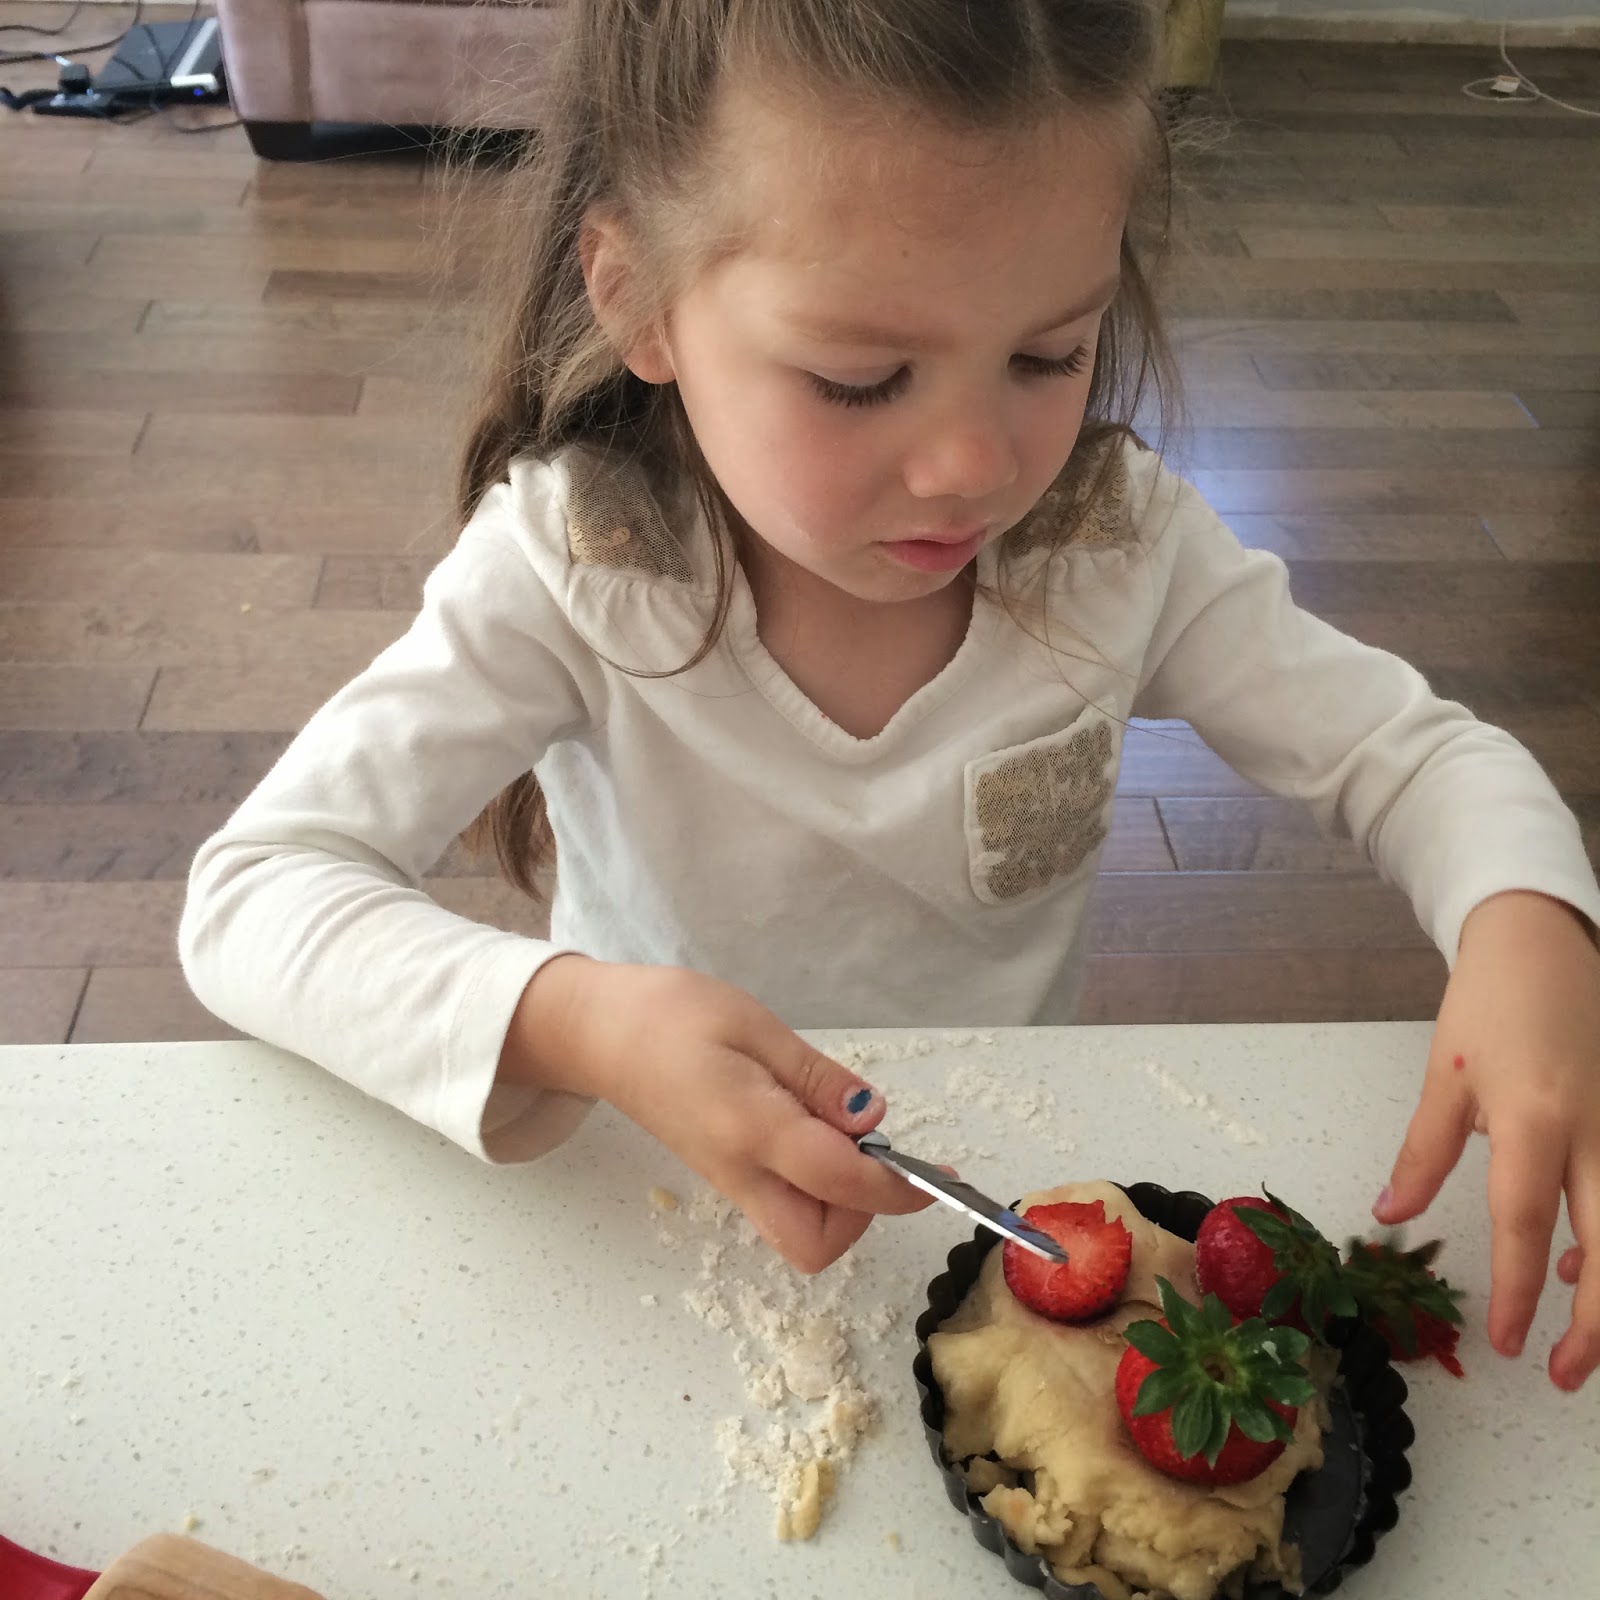
Clara loves when I make pies because I always give her the extra dough scraps from the crust and she uses her little rolling pin and a mini tart pan to make her own "pies". 


When the perfectly golden pie comes out of the oven with the tangy and sweet filling bubbling up out of the holes in the lattice top, it is a powerful thing.  I'm pretty sure this pie could bring about world peace. 


Strawberry Rhubarb Pie

2 1/2 cups chopped red rhubarb, fresh
2 1/2 cups strawberries, washed, hulled and cut into pieces about the same size as the rhubarb
1 1/2 cups sugar
3 tablespoons minute tapioca
1 tablespoon all-purpose flour
1/2 teaspoon lemon zest
1/2 teaspoon lemon juice
1/2 teaspoon ground cinnamon
1 teaspoon vanilla extract
3 tablespoons butter, cubed small
1 egg beaten with 1 teaspoon water
Sugar for sprinkling on top
 
Prepare double-crust pie crust recipe.  Roll out one half of the crust and cover the bottom of a pie dish, while reserving the other half of the dough for the top crust. 
 
Mix the rhubarb, strawberries, sugar, tapioca, flour, lemon zest and juice, cinnamon, and vanilla. Mix well in a large bowl and pour out into prepared crust. Dot the top of the filling with the butter.  Roll out the other piece of dough and place over filling either as a solid crust or by cutting into strips and laying them out in a lattice pattern. Crimp to seal edges. Brush with egg wash and sprinkle with sugar. Loosely cover edges with foil and bake at 425 degrees F for 15 minutes. Decrease temperature to 375 degrees F and bake for an additional 45 to 50 minutes, or until the filling starts bubbling and crust is golden brown.
 
Let the pie cool for at least 2 hours before cutting and serving.

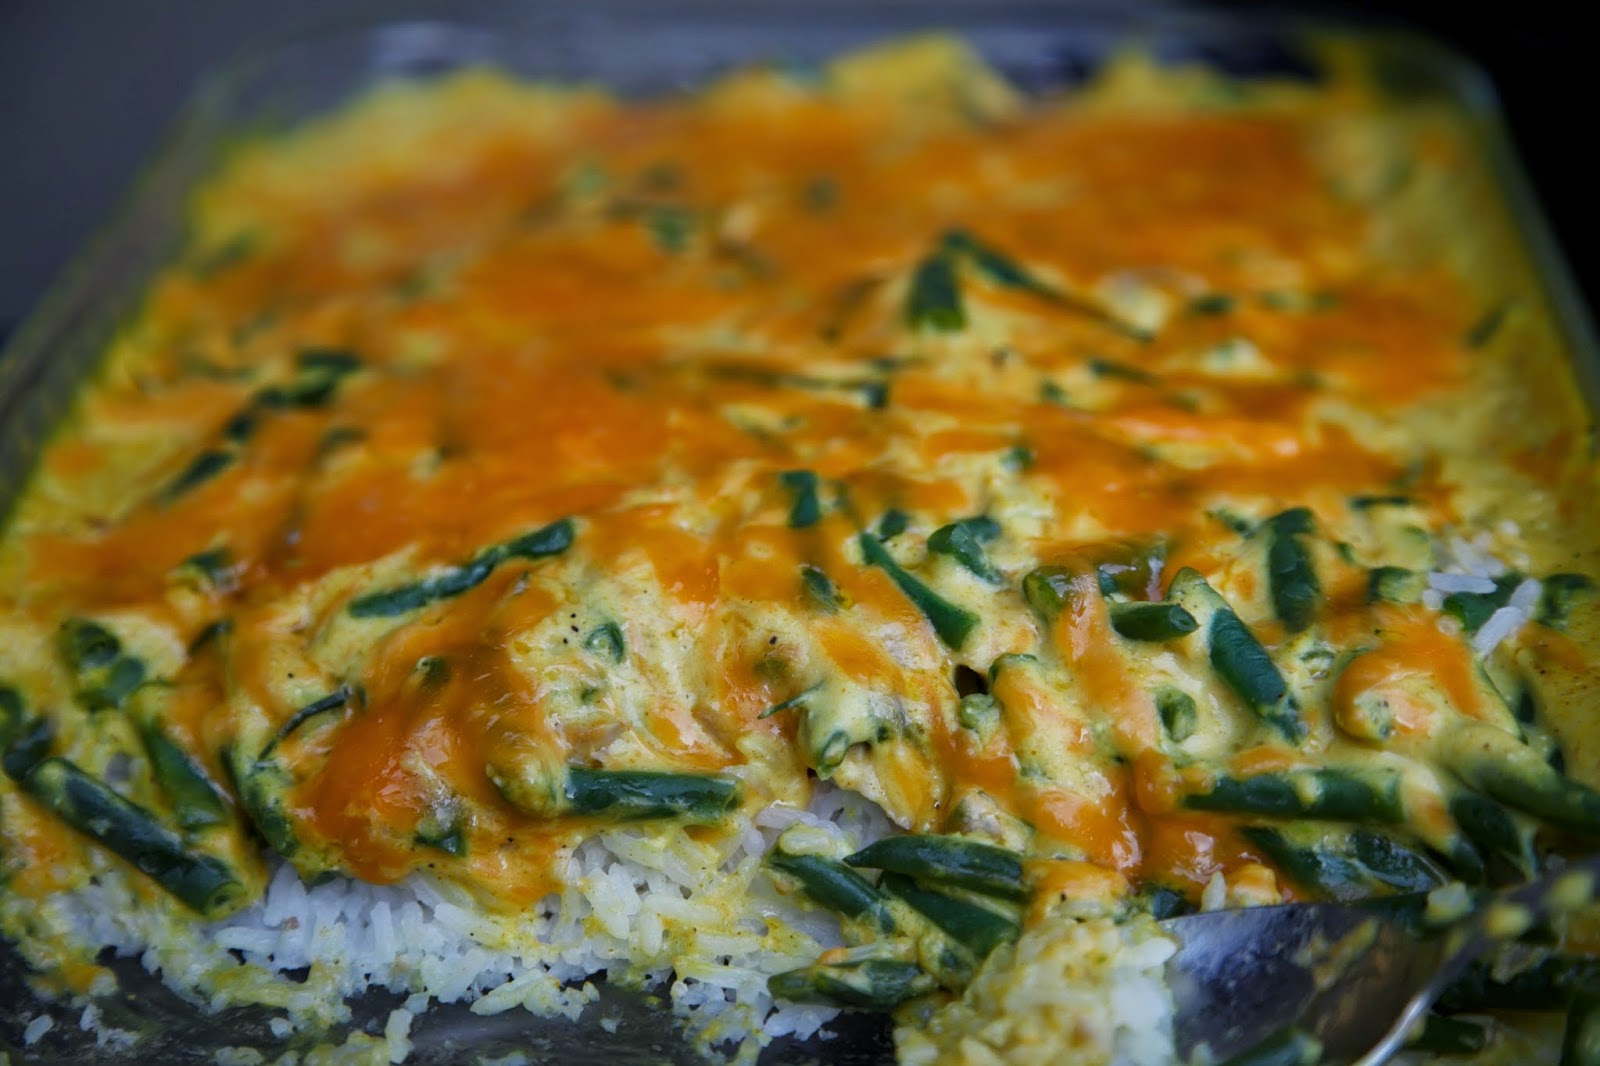
Cheesy Chicken, Green Bean & Rice Casserole


Casseroles get a bad rap and it is too bad.  I mean, they are (at least theoretically) a balanced meal in one dish.  There are definitely some bad casseroles out there, but if you have ever had a really, really good casserole you will know how truly great they can be. 

Really this was originally chicken, broccoli, and rice casserole, but I substituted fresh French green beans in place of the broccoli and it was wonderful. So you could use broccoli if you prefer and it would be great.  When I was a growing up, I would ask for this casserole every year for my birthday dinner and it is still one of my favorite comfort foods. And Clara and Rose both love it too, which makes it a perfect meal to serve on a weeknight.


Cheesy Chicken, Green Bean & Rice Casserole

About 2 1/2 cups prepared Jasmine rice
1-2 cups chopped or shredded chicken breast (I like using leftover greek chicken but you can use a rotisserie chicken from Costco to make things easy)
1 1/2-2 cups green beans, chopped into bite size pieces and steamed just until tender but not overcooked
1 small can cream of chicken soup
1 cup plain greek yogurt
2-3 tablespoons curry powder, to taste
1 1/2 cups shredded sharp cheddar cheese, divided
 
Cook rice, green beans and chicken ahead of time.

In a bowl, stir together the cream of chicken soup with the greek yogurt and curry powder. Add about 1 cup of the shredded cheese and stir to combine.

In a 9x13-inch casserole dish, layer rice first, then distribute chopped or shredded cooked chicken over it, followed by the green beans (or broccoli, if you prefer). Top with dollops of the chicken soup mixture and spread out to cover the casserole, then sprinkle with remaining 1/2 cup of shredded cheese.

Cover casserole with aluminum foil and bake in the oven at 425 degrees for about 30 minutes, or until everything is hot and cheese has melted.